Making a Damascus Katana
The comission
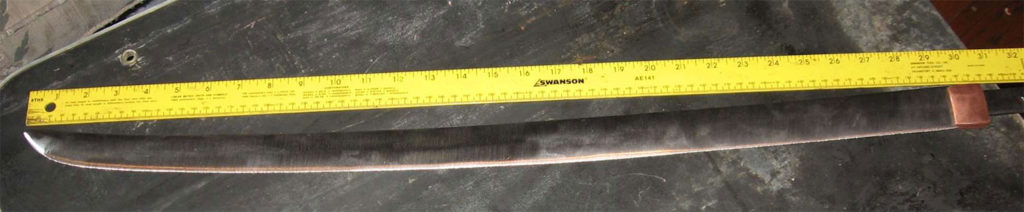
This blade is to have a nagasa 29 inches long, and have a shallow 2cm sori. To figure out how much steel I needed to to start with, I added 50% the proposed finished length of the blade to make sure I had enough after reductions from scale loss, and removal during the pattern’s cutting to make the blade, giving me 42 inches of starting material. If I have any steel left over, I can use it for other things.
I am using 4 layers of 1/8 inch thick 1095 and 3 layers of 3/16 inch thick L-6. The 1095 will give me a dark layer, and the L-6 is an alloy that contains some chrome for deep hardening, and some nickel and molybdenum for grain refinement as well as a bright silver color when finished.
Seven layers gives a beginning size of 1 inch wide, 1.25 inches thick and 42 inches long. After carbon migration and losses from scale, this billet should have an average of between 0.65 and 0.70 points of carbon. This is plenty to make a blade harden, without too much which could make the blade brittle.
Preparation
The stack weighed 14 pounds 10 1/2 ounces, before I tied it with the temporary wires. Rather than start with a heavy 42 inch long bar, I cut it into sections first to make my work easier. If I were to begin with one long bar, it would be hard to hold onto while making the initial welds. I do not believe it affects the pattern. I began with three 14 inch long sections, and after welding solid, and making sure to keep the dimentions the same for each, I combine them, giving me 21 layers. Then I draw it out and cut into thirds, weld, and I have 63 layers. This continues untill I have the desired number of layers. I usually attempt to end with 300 layers.
The client wanted a finer pattern, so I made this with around 460 layers. I have to account for a loss of layers due to scale. The only way to know for sure the exact number of remaining layers after scale loss, would be to cut up the bar, etch and count the layers under a microscope, but I do not need an exact count.
Pattern development
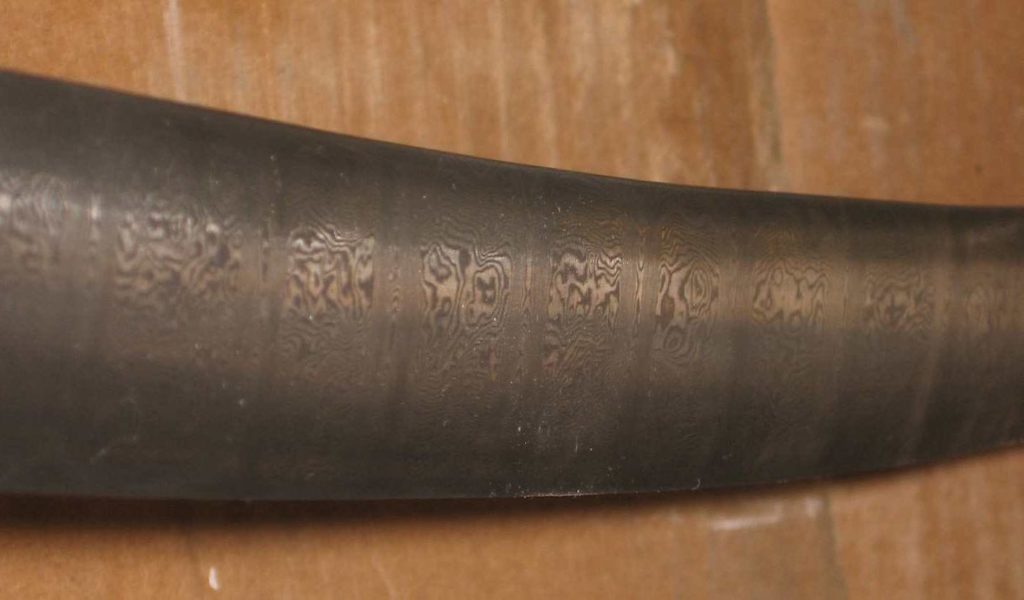
Since this will be a ladder pattern, I will make the bar about 1/2 inch thick, and about 24 inches long.
Because a Katana is a single edged blade, the normal process for making the ladder pattern will not look the same on this finished blade, as when done with a double edged blade. To compensate for this, I deviated from the normal method of making equal depth cuts across the bar about half way through on all the cuts.
This process is not much different but I cut shallow in the middle of the bar, and deeper near the edges. I repeat this procedure on the other side, making sure the shallow cuts are offset from the cuts of first side. This is no different from the normal method where I alternate the spacings of the cuts on each side. The resulting pattern appears as a variation of the normal ladder pattern. This is much better than the standard methods would give without dual edges on the blade.
The blade takes shape
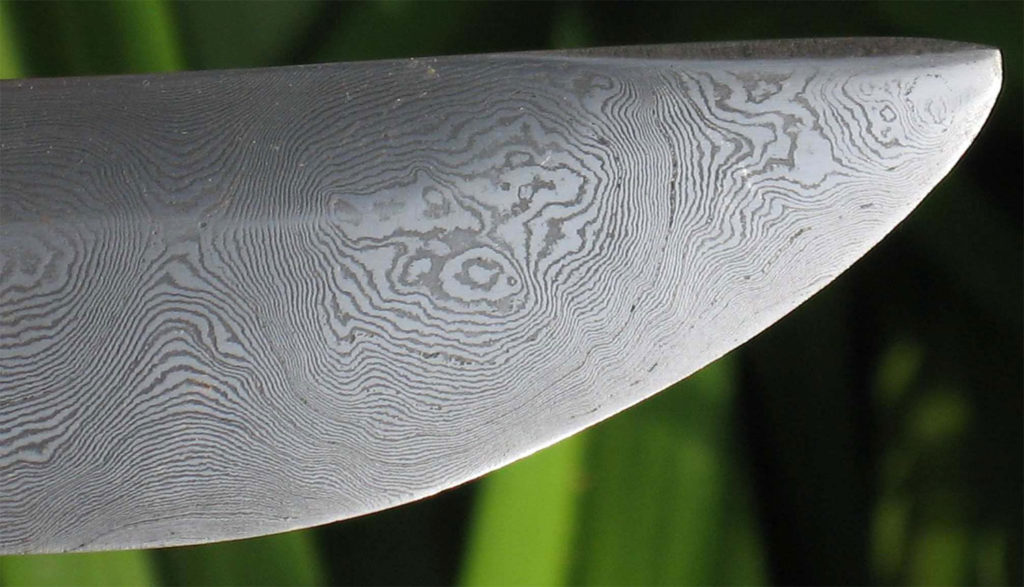
With all the cuts made, I go back to the anvil and flatten this billet into a 32 inch long, solid bar of steel. The layers that were at the bottom of the cuts are now brought up to the surface, giving the pattern its definition. The pattern of this bar will not be very apparant until after we etch the blade. For all general purposes, this is the beginning point when making a mono-steel blade.
Taking the steel bar to the proper shape and thickness, and formation of the tang, I now have what looks almost like a katana. Most of the arc we associate with this style of blade comes from the method of coating the blade with clay and quenching, not just from shaping at the anvil.
To the grinder
The blade is ready to be taken into the shop for grinding and sanding. Starting with 60 grit, I remove all surface scale, and any hammer marks. After the surface is smooth, I use files to get all the profiles in order, then move up to 120 grit and clean the established bevels and other lines of the blade, then progressing through 220, then 400 grit papers.

Heat Treating
Normalizing
This is a process of changing the internal structures of the steel. After all this hammering and grinding, stresses have built up in the steel, we must releave these by using a process known as normalizing. By heating the steel to above its austenitic state, about 1550F for this mix, then allowing it to cool slowly in still air. This allows the austenite to become pearlite, and to relax the steel. We do this 2 more times, at 1530F then at 1510F, to make sure we do not leave any stress that could warp the blade during the hardening process. Dropping the tempratures a little bit each time also helps to reduce the grain size.
Hardening
Now we can go about making the steel hard enough to hold a cutting edge. I heat the steel above critical, to 1500F,and allow it to soak a few minutes to be sure it is heated evenly, then quenched in oil to cool it to below 900F in less than 0.8 seconds. This fast cooling, prevents the metal from turning to pearlite, and causes the steel to freeze with the carbon inside the ferritic matrix creating a form of steel known as martensite.
Martensite is the hardest of the forms of steel, but it is also very brittle. I must reduce this brittleness, by heating gentely in a process called tempering. This converts some of the martensite into a form that was once called troosite, I am not sure if that term is used any more.
Austempering
For large blades, such as this one, I like to use a technique known as austempering. In this process the quench oil is at a higher temprature, in this case 450 degrees F, and the blade and oil are kept at that temprature for 4 hours or longer. This allows a portion of the metal to become a form known as bainite. While the bainite may give me a blade about 2 points softer on the Rockwell C hardness scale than a fully martensitic structure, it is so much stronger, I feel its worth the loss of a few points. Also remember this is a sword. I do not need, nor desire it to be above 55 RHC, so its a good trade both ways.
Sub-zero Quench
After this I remove the blade and allow it to cool to room temprature. Then a sub-zero freeze to convert any retained austenite from the quenching, into martensite. this is done by placing the blade in a bath of Acetone and cruched dry ice. Then a tempering cycle at 410F for 2 hours to relax the newly converted martensite, ending up with a Katana of mixed bainite and martensite. Than back to the grinder. Using 400 grit, then hand sanding with 800 then finally 1200 grit papers. Finally I etch with a 1.5% solution of ferric chloride and then a buff at 1800 grit for a nice polish
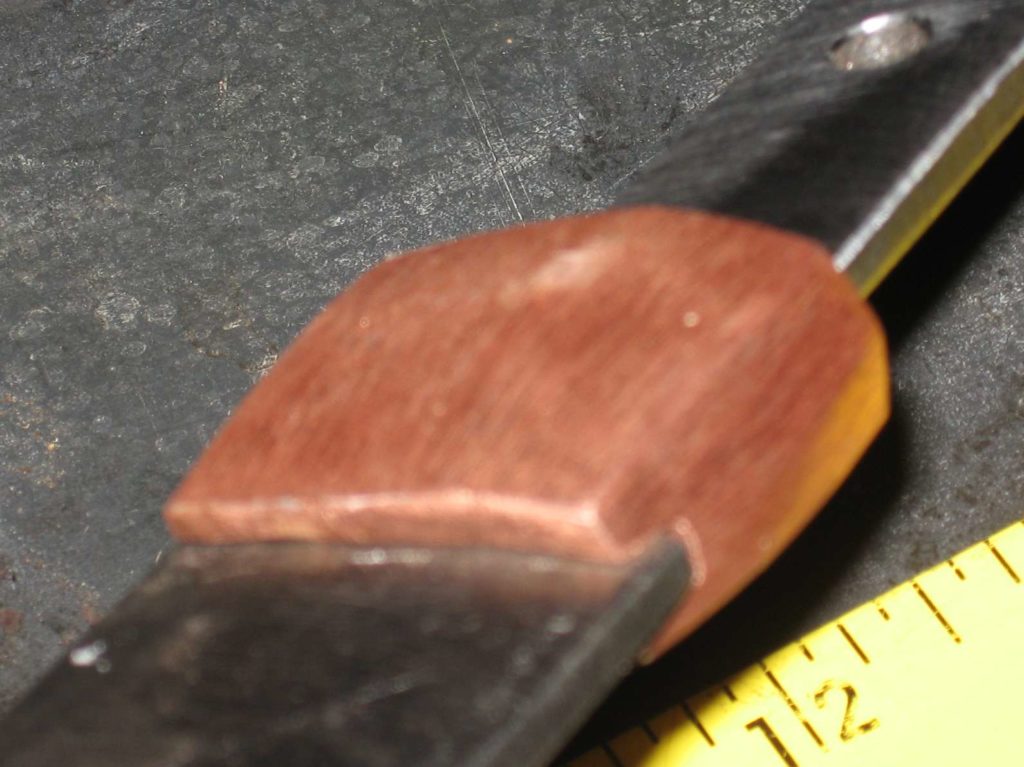
Making the Habaki
The habaki is the collar that fits on the blade just before the tsuba. It has to be fit to the blade tightly. Not only is this an attractive componant, it helps to hold the tsuba in position and keeps the Katana solid in the Saya.
Tsuba
The tsuba is the blade guard. For this project I am making a radial ladder type pattern in ickel damascus. The cuts will be made in a pattern, starting from the center with a shallow cut, cutting deeper toward the outside.
Packing for shipment
It is now the time to send the finished blade and hardware to the client. First I place a 1 inch thick styrofoam sheet in the 40″ x 6″ x 3″ wooden box I built just for this blade out of 3/4 inch pine boards. Then a second layer of styrofoam, cut out the inside in the exact shape of the blade.
This is the end result of my portion of the work. Taking the steel, through the forging and forming process and ending up with this blade, in this box, on its way to be mounted at its new home somewhere in Idaho.